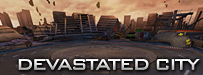
[ZM] Devastated City Guide
Devastated City
A Guide by me....lol")
This is the new ZM map! Featuring an all new butt kicking boss Atlas, and tons of new features!
This guide will include all Monsters in this map, tips and tricks, and how to
beat the map.

Abilities/items in the map

By pressing the "F" key, your character spin kicks
the enemy backwards.
Extremely useful on Elite Assault troopers.
This ability has a cool down and can be replenished by shooting at monsters.

By pressing your shift key,
your character quickly slides forward.
This can be stopped by pressing the space bar.
Extremely useful for getting out of sticky situations,
and when you are surrounded. Also useful for doging attacks.
This ability has a cool down
and can be replenished by shooting at monsters.

A Health crate.
It spawns in certain locations on certain rounds (leaning towards the final rounds).
It heals the players hp.

A Grenade crate.
It spawns in certain locations on certain rounds.
It give the player a powerful grenade that
does high damage to monsters,
but does no damage to other players.

The AP Gatlin gun.
A perk you can get on several high rounds.
Its a lightweight, no recoil minigun
that is very effective against monsters.
It disappears after the time runs out.

The Laser gun.
A perk you can get several high rounds.
Its a lightweight lasergun with
no recoil that is very effective against monsters.
It disappears after the time runs out.

The force field.
It runs around the map and doesnt allow players to pass it.
If you jump onto it it bounces you into the air
and launches you backwards. Grenades beyond the force field do NOT damage the boss.
Useful for doging/running from monsters and attacks.
Round Guide
(list taken from the Devastated Wiki page)
Wave 8: First bonus round where Dreads will chase EMD Lab's little boy, who Soldiers must protect. The kick ability will become unlimited until the wave finishes.
Wave 12: Second bonus where swarms travel across the map; they can't be killed but still reward points when shot at. The slide ability will become unlimited until the wave finishes.
Wave 13: A cutscene occurs and Ships will start appearing dropping groups or squads of four basic Assault Troopers for each ship spawned.
Wave 14: Ripper Wheels will spawn from the tunnel at the back, they will follow a slow pattern starting from the mid to far portion of the map and slowly coming closer, once this pattern is finished they will begin targetting and charging players. Ulike the Boomers from previous maps, these will actually damage players coming contact with them.
Wave 15: Another cutscene plays showing Atlas emerging from his statue and Pollutants will spawn from 4-5 different points outside the map
Wave 16: Third bonus, where soldiers must lure armadillos into the targets to gain of extra points. The kick ability will become unlimited until the wave finishes.
Wave 17: Elite Assault Troopers are introduced, they are the toughest non-boss enemies up to date which takes more than one full MG magazine to kill. Use Kick and Slide wisely to deal with them.
Wave 20: The map's mini-boss is none other than the Destroyer's first form from Dinner Theater. (Last Wave if on Easy option)
Wave 22: A large amount of Pollutants and Moles will confront players. There are only three Special Weapon drops instead of five like previous waves, and occasionally Sticky Bomb will appear instead of AP Gatling Gun or Laser Blaster.
Wave 24: Fourth bonus; soldiers must eliminate the Mysterious Girl once again, plus the zombies. The kick ability will become unlimited until the wave finishes.
Wave 30: Soldiers will now face up against the humongous lizard Atlas (on Normal).
Monsters
Atlas

A Guide by me....lol
This is the new ZM map! Featuring an all new butt kicking boss Atlas, and tons of new features!
This guide will include all Monsters in this map, tips and tricks, and how to
beat the map.
Abilities/items in the map
By pressing the "F" key, your character spin kicks
the enemy backwards.
Extremely useful on Elite Assault troopers.
This ability has a cool down and can be replenished by shooting at monsters.
By pressing your shift key,
your character quickly slides forward.
This can be stopped by pressing the space bar.
Extremely useful for getting out of sticky situations,
and when you are surrounded. Also useful for doging attacks.
This ability has a cool down
and can be replenished by shooting at monsters.
A Health crate.
It spawns in certain locations on certain rounds (leaning towards the final rounds).
It heals the players hp.
A Grenade crate.
It spawns in certain locations on certain rounds.
It give the player a powerful grenade that
does high damage to monsters,
but does no damage to other players.
The AP Gatlin gun.
A perk you can get on several high rounds.
Its a lightweight, no recoil minigun
that is very effective against monsters.
It disappears after the time runs out.
The Laser gun.
A perk you can get several high rounds.
Its a lightweight lasergun with
no recoil that is very effective against monsters.
It disappears after the time runs out.
The force field.
It runs around the map and doesnt allow players to pass it.
If you jump onto it it bounces you into the air
and launches you backwards. Grenades beyond the force field do NOT damage the boss.
Useful for doging/running from monsters and attacks.
Round Guide
(list taken from the Devastated Wiki page)
Wave 8: First bonus round where Dreads will chase EMD Lab's little boy, who Soldiers must protect. The kick ability will become unlimited until the wave finishes.
Wave 12: Second bonus where swarms travel across the map; they can't be killed but still reward points when shot at. The slide ability will become unlimited until the wave finishes.
Wave 13: A cutscene occurs and Ships will start appearing dropping groups or squads of four basic Assault Troopers for each ship spawned.
Wave 14: Ripper Wheels will spawn from the tunnel at the back, they will follow a slow pattern starting from the mid to far portion of the map and slowly coming closer, once this pattern is finished they will begin targetting and charging players. Ulike the Boomers from previous maps, these will actually damage players coming contact with them.
Wave 15: Another cutscene plays showing Atlas emerging from his statue and Pollutants will spawn from 4-5 different points outside the map
Wave 16: Third bonus, where soldiers must lure armadillos into the targets to gain of extra points. The kick ability will become unlimited until the wave finishes.
Wave 17: Elite Assault Troopers are introduced, they are the toughest non-boss enemies up to date which takes more than one full MG magazine to kill. Use Kick and Slide wisely to deal with them.
Wave 20: The map's mini-boss is none other than the Destroyer's first form from Dinner Theater. (Last Wave if on Easy option)
Wave 22: A large amount of Pollutants and Moles will confront players. There are only three Special Weapon drops instead of five like previous waves, and occasionally Sticky Bomb will appear instead of AP Gatling Gun or Laser Blaster.
Wave 24: Fourth bonus; soldiers must eliminate the Mysterious Girl once again, plus the zombies. The kick ability will become unlimited until the wave finishes.
Wave 30: Soldiers will now face up against the humongous lizard Atlas (on Normal).
Monsters
Atlas
This monster is the Boss on Normal difficulty of the map.
Health: Extremely high
Damage: Very high
Appears on level(s): Final level (30)
Attacks: Throwing objects, Lasers, Sending out King Speedillos, and breathing fire.
Tips: Aim for the head, and keep shooting. Lmgs and high damage rifles work the best.Health: Extremely high
Damage: Very high
Appears on level(s): Final level (30)
Attacks: Throwing objects, Lasers, Sending out King Speedillos, and breathing fire.
His looks can be deceiving. Knowing the tricks on how to beat him is the key to success.

One of his highest damage dealing attacks would be throwing debris at the players.
If hit by one of these, a staggering 50 damage will be dealt on the player.
One way to avoid this attack is to use the slide (shift button) which launches the player at a fast speed.

His lasers are pretty easy to dodge.
I recommend running sideways to avoid his lasers, but careful as
Atlas sometimes quickly shoots a fast laser bolt with his tail after shooting the first wave of lasers.

When Atlas shoots out King speedillos,
i recommend shooting them and walking backwards at the same time.
After they are gone resume attacking Atlas.
Another way is to just avoid these monsters completely and just ignore them and keep shooting at Atlas while moving as kingspeedillos cannot move as fast as you.

There are 2 modes when atlas shoots fire. One mode is where he aims at one person and shoots fire, the other one is where Atlas does a frenzy attack and shoots flames around the entire map.
1. When Atlas has more than half of his life: He will be always aiming at one player in the map, so you just have to avoid it by running or sliding.
2. When Atlas has less than half of his life: his attack pattern changes and he will shoot from periphery to center of the map. To avoid this, take in count he will be spinning 2 times (with his fire breath) around the map (counterclockwise dir.) before getting to the center, so you can stay in the center shooting till he is almost to finish the second fire spin, then slide to any side of the map and keep shooting. If Atlas is on a frenzy there is a certain spot in the map where he doesnt shoot fire. I have posted a picture of it below.

Swarm

Health: Infinite
Damage: Low
Appears on level(s): 12
Attacks: Basic
Tips: Stay in the middle of the map.
Look constantly for new swarms spawning.
Easily doge-able. Keep shooting at them, as they give you points.
They disappear when the round ends.
Destroyer Jr.

Health: High
Damage: High
Appears on level(s): Wave 20.
Attacks: Basic
Tips: Headshots. Get the person who Destroyer is following to run around the map or run around him in circles.
Winged Tearer

Health: Medium
Damage: Low
Appears on level(s): Many levels throughout the match.
Attacks: Basic
Tips: Headshots work the best, keep your distance.
The Ripper wheel

Health: Medium
Damage: Low
Appears on level(s): Many levels throughout the match.
Attacks: Basic
Tips:
Stay in the middle of the map.
Comments
-
Reserved for more pictures. Cant add more than 20 to the original thread

The Boomer Wheel
Health: Medium
Damage: Low - High
Appears on level(s): Many levels throughout the match.
Attacks: Basic
Tips: Stay in the middle
of the map and away from the
blast these monsters create after they die.
Pollutant
Health: Medium
Damage: High
Appears on level(s): Many levels throughout the match.
Attacks: Basic
Tips: Keep your distance and you should be fine. Aim for the head.
Elite Assault Trooper & Basic Assault Trooper
Elite Assault Trooper
Health: High
Damage: High
Appears on level(s): Many levels throughout the match.
Attacks: Basic
Tips: Keep your distance,
aim for the head, spin kick them if they are too close.
Basic Assault Trooper
Health: Medium
Damage: Medium
Appears on level(s): Many levels throughout the match.
Attacks: Basic
Tips: Keep your distance,
aim for the head, spin kick them if they are too close.
King and basic speedillo
King Speedillo
Health: Medium
Damage: Low
Appears on level(s): Many levels throughout the match.
Attacks: Basic
Tips: Keep your distance, run and shoot.
Basic Speedillo
Health: Low
Damage: Low
Appears on level(s): Many levels throughout the match.
Attacks: Basic
Tips: Keep your distance, run and shoot.
Dread
Health: Low
Damage: Low
Appears on level(s): Many levels throughout the match.
Attacks: Basic
Tips: Shotguns and grenades for big piles of them work the best.
Careful as they sometimes spawn in masses
in the middle of the arena and you should get
out of there by sliding as fast as possible to avoid being swarmed.
Other monsters that arent worth mentioning.
Assassin (refills ammo if you kill them )
Maiden (fast low health monsters ) -
Nice Guide.
I disagree on the shotguns however. Bringing a shotgun is not ideal for this type of ZM map because majority of the zombies have high HP unlike on other maps, and on top of that there really isn't much break time between waves so your better off if you carried a strong assault rifle which has a decent amount of ammo compared to a shotgun with a bit less damage or even an LMG which does less dmg but has lots of ammo.
Heavy MG's wouldn't do any good either but I think this map was meant for Assault rifles since it would just take too much time if your using LMG's. Unless ofc, you can aim in the head every for every monster coming at you in every wave. -
SEG_Golden wrote: »Nice Guide.
I disagree on the shotguns however. Bringing a shotgun is not ideal for this type of ZM map because majority of the zombies have high HP unlike on other maps, and on top of that there really isn't much break time between waves so your better off if you carried a strong assault rifle which has a decent amount of ammo compared to a shotgun with a bit less damage or even an LMG which does less dmg but has lots of ammo.
Heavy MG's wouldn't do any good either but I think this map was meant for Assault rifles since it would just take too much time if your using LMG's. Unless ofc, you can aim in the head every for every monster coming at you in every wave.
True, ill remove the shotgun parts from the thread. Thanks for the input.
Also thanks everyone for the feedback -
Oni_Dragon wrote: »I would say it depends on the shotgun M1216 Blueskull ksg AA-12 basically high damage high ammo shotguns work best here, low damage low ammo shotguns I wouldn't recommend
Yeah, the m1216 is probably the best shotgun for zm.
Ksg doesnt have a mag reload so it reloads ultra slow.
AA-12 is nice, but it costs zp.
Any other shotty is trash. Beside the stakeout which u need to win in the bm. -
Well done, this is neat with some nice quality images.
A slight minor mistake I noticed. It should be the (shift) button, right?One way to avoid this attack is to use the slide (Crouch button) which launches the player at a fast speed.
Also another thing:
Technically you don't have to shoot them at all. Their speed is not fast enough to get in range for their attacks on the players. Just keep moving and look at the minimap once in awhile, while shooting the Atlas, is the best option in my opinion. Shooting those little creeps guarantee no points. xDWhen Atlas shoots out King speedillos,
i recommend shooting them and walking backwards at the same time.
After they are gone resume attacking Atlas.
But overall this is a great guide for the map and what it features. -
[MOD]Fizzeq wrote: »Well done, this is neat with some nice quality images.
A slight minor mistake I noticed. It should be the (shift) button, right?
Also another thing:
Technically you don't have to shoot them at all. Their speed is not fast enough to get in range for their attacks on the players. Just keep moving and look at the minimap once in awhile, while shooting the Atlas, is the best option in my opinion. Shooting those little creeps guarantee no points. xD
But overall this is a great guide for the map and what it features.
Ty men. And your right, it is the shift button. I was confused since i switched my ctrl and shift button controls since its too hard to bhop with the ctrl button being so small and far away.
And your opinions have been put into the thread.On the guide: nicely put together
On the IGN: Reported
T-T
Changing it soon anyways -
Wow, this is really a nice guide!
Just one thing.
The blind spots in the map are not the only way to avoid the boss attack when he fires at around the map.
Remember this:
1. When Atlas has more than half of his life: He will be always aiming at one player in the map, so you just have to avoid it by running or sliding.
2. When Atlas has less than half of his life: his attack pattern changes and he will shoot from periphery to center of the map. To avoid this, take in count he will be spinning 2 times (with his fire breath) around the map (counterclockwise dir.) before getting to the center, so you can stay in the center shooting till he is almost to finish the second fire spin, then slide to any side of the map and keep shooting.
*Alt. way to avoid fire breath attack: as you mentioned, the blind spot(s) in the map.
I don't have nothing more to say I guess. Try to consider this tip to get this guide much more helpful for players, if you think this can also help them. -
AuraSphere wrote: »Wow, this is really a nice guide!
Just one thing.
The blind spots in the map are not the only way to avoid the boss attack when he fires at around the map.
Remember this:
1. When Atlas has more than half of his life: He will be always aiming at one player in the map, so you just have to avoid it by running or sliding.
2. When Atlas has less than half of his life: his attack pattern changes and he will shoot from periphery to center of the map. To avoid this, take in count he will be spinning 2 times (with his fire breath) around the map (counterclockwise dir.) before getting to the center, so you can stay in the center shooting till he is almost to finish the second fire spin, then slide to any side of the map and keep shooting.
*Alt. way to avoid fire breath attack: as you mentioned, the blind spot(s) in the map.
I don't have nothing more to say I guess. Try to consider this tip to get this guide much more helpful for players, if you think this can also help them.
Ah, thanks bud. Will definitely add this to the thread! -
Yeah, the m1216 is probably the best shotgun for zm.
Ksg doesnt have a mag reload so it reloads ultra slow.
AA-12 is nice, but it costs zp.
Any other shotty is trash. Beside the stakeout which u need to win in the bm.
i lost this event
my connection was closed at this time i am really so lucky xD -
-
Exiledking63 wrote: »VIP RPK works really well in this map......................
Don't forget the Thompson VIP too. :P
~
Oh and this guide should be updated actually. Special weapons do now appear during waves 28 and 30 as well. Getting wins in Devastated City just became much easier after Wave 23 haha. -
[MOD]Fizzeq wrote: »Don't forget the Thompson VIP too. :P
~
Oh and this guide should be updated actually. Special weapons do now appear during waves 28 and 30 as well. Getting wins in Devastated City just became much easier after Wave 23 haha.
Yeah and that is good also. I was thinking this version of DC would stay nerfed and no as in the other versions, in which they always had that kind of stuff in advanced waves. -
[MOD]Fizzeq wrote: »Don't forget the Thompson VIP too. :P
~
Oh and this guide should be updated actually. Special weapons do now appear during waves 28 and 30 as well. Getting wins in Devastated City just became much easier after Wave 23 haha.
Thanks for the info. -
Stargyptian wrote: »Where ez hard mode?
Menz why ez chinese???
Didnt have a picture of it LOL.
As for the hard mode, ive been too busy and lazy XD. And i havent even been able to finish it myself LOL. I died last time i tried hahahahaNice guide, it's really helpful. I like the part with the monsters and thier health")
Thanks XD -
Didnt have a picture of it LOL.
As for the hard mode, ive been too busy and lazy XD. And i havent even been able to finish it myself LOL. I died last time i tried hahahaha
Thanks XDNp hehe, if u need any help with the tutorial just PM me and I will be glad to assist u -
Np hehe, if u need any help with the tutorial just PM me and I will be glad to assist u
I would love a tutorial on the Hard level, especially when dealing with the last boss. I've only won twice ever, and it's usually been out of luck.
For the "fire-free" zones, I've found that as long as you run up against the force field right in front of Atlas (when he has less than half of his health) you won't get burned. I don't know if he always stands in the same spot when he breathes fire, but that's what I've noticed.


Categories
- All Categories
- Z8Games
- Off-Topic - Go To Game OT Forums
- 1 Z8 Forum Discussion & Suggestions
- 16 Z8Games Announcements
- Rules & Conduct
- 5.2K CrossFire
- 951 CrossFire Announcements
- 942 Previous Announcements
- 2 Previous Patch Notes
- 1.4K Community
- 122 Modes
- 600 Suggestions
- 85 Clan Discussion and Recruitment
- 274 CF Competitive Forum
- 19 CFCL
- 26 Looking for a Team?
- 703 CrossFire Support
- 52 Suggestion
- 116 Bugs
- 29 CrossFire Guides
- 166 Technical Issues
- 47 CrossFire Off Topic